Sigmafine Client Installation
This installation is for a client on a client machine only.
Important Note: Do not use the option to install only the Sigmafine Client on the Server. Once you run the install for either the server or the client you cannot re-execute install and select another component to install. It will take you to the Program maintenance screen to modify or repair.
The actual installation consists of six main steps that need to be followed in the exact order in which they are listed below:
- Step 1: Install the Sigmafine Client
- Step 2: Install the PI AF Client 2018 SP3
- Step 3: Install PI ProcessBook 2015 R3
- Step 4: Install the Sigmafine Modeler Add-in
- Step 5: Install the Sigmafine Client Setup
- Step 6: Install the Sigmafine Excel Add-in
Step 1: Install the Sigmafine Client
Install Microsoft Excel.
This is a prerequisite necessary to support OSIsoft PI AF Builder Add-in and Sigmafine Excel Add-in.
Note: Microsoft Excel x86 and x64 are supported.
Run the Sigmafine Server and Client 4.7.0.exe as admin.
The Welcome window opens.
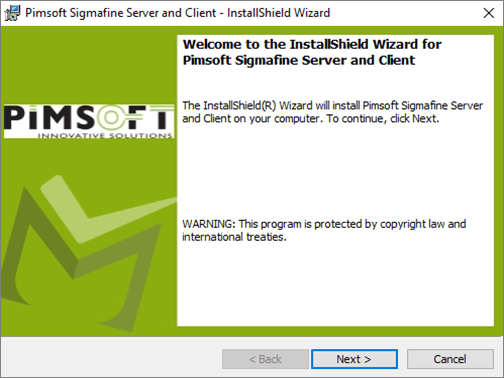
Click Next.
The Select Sigmafine Installation Type window opens.
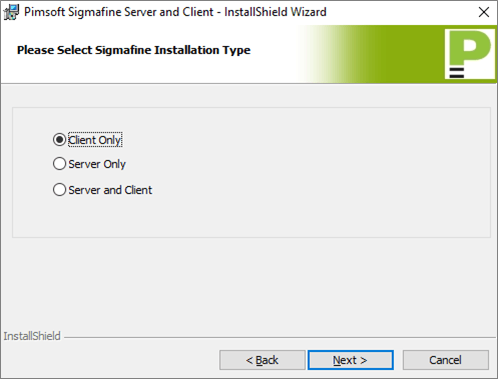
Select the Client Only option for the Installation Type.
Click Next.
The License Agreement window opens.
Figure 11: Sigmafine Server and Client Install - License Agreement window
Select the I accept the terms in the license agreement option.
Click Next.
The Customer Information window opens.
Figure 12: Sigmafine Server and Client Install - Customer Information window
In the user Name box, type the name of the Windows user.
In the Organization box, type your organization's name.
Click Next.
The Destination Folder window opens.
Figure 13: Sigmafine Server and Client Install - Destination Folder window
To set the destination folder, click the Change button and select the location you want to use.
We recommend that you use the destination folder that is automatically displayed when you run the kit.
Click Next in the Destination Folder window.
Click Install to continue with the installation.
When the installation completes, click Finish to exit the installation after it finishes.
Verify that the Sigmafine installation was correctly installed.
Open the PI System Explorer.
Confirm that the Sigmafine Analysis Rule and Data Reference plug-ins exist.
Figure 14: Sigmafine Analysis Rule and Data Reference plug-ins
For installations where Sigmafine Client was installed, verify that the Sigmafine Analysis tab is displayed in the left pane.
Figure 15: Sigmafine Analysis tab
Step 2: Install the PI AF Client 2018 SP3
To install the PI AF Client:
If there is no other OSISoft Installation on this machine, the PI AF Client install kit installs the PI-SDK plus PI AF Client for 32 bits and the PI AF Client for 64 bits (if the machine is a 64bit machine). The install also includes the PI System Explorer and AF user documentation.
When prompted to enter a User Name, it is okay to keep the ‘pidemo’ user name.
When prompted for the Server name, type the server name that was created during the server installation.
Click Next.
Select the "typical" installation.
This option is recommended for most users. If there is no other OSISoft Installation on this machine, the PI AF Client install kit installs the PI-SDK plus PI AF Client for 32 bits and the PI AF Client for 64 bits (if the machine is a 64bit machine). The install also includes the PI System Explorer and AF user documentation.
After the installation is done, we recommend that you check the connectivity to the AF server.
Note: The PI AF Client installation provides the option of selecting the Management Plug-In from the list of features included. This is an optional feature for the client installation only. The server installation installs this feature by default.
Step 3: Install PI ProcessBook 2015 R2 or R2 SP1
- Please install either PI ProcessBook 2015 R2 or PI ProcessBook 2015 R2 SP1 or 2015 R3.
Step 4: Install the Sigmafine Modeler Add-in
- To install, follow the process in the PI ProcessBook Installation manual for installing the Modeler Add-in.
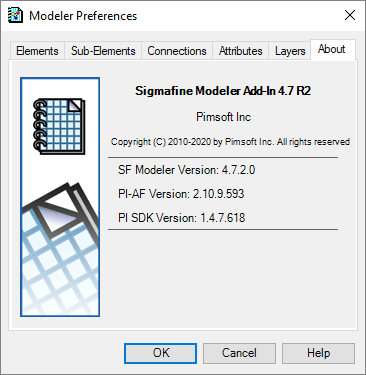
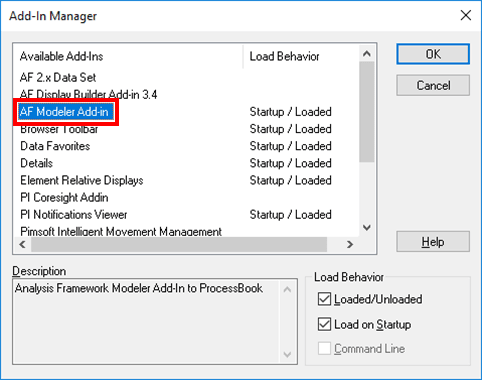
- To verify that the Sigmafine Modeler Add-In was properly installed:
- Open ProcessBook.
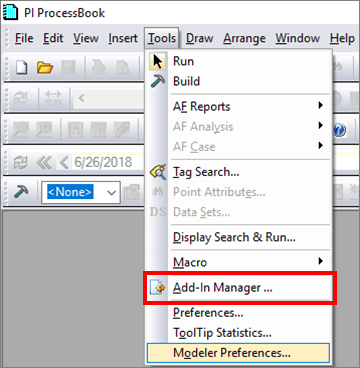
- From the menu, select Tools > Add-In Manager ... and ensure that the add-in appears in the list.
Step 5: Install the Sigmafine Client Setup
- Install the Sigmafine Client if it has not already been installed.
- Once installed, copy the Sigmafine Analysis plug-in AFPlugInSigmafineAnalyses.dll file from the
\Program Files (x86)\Sigmafine\bindirectory to the\Program Files\PIPC\AFdirectory.
Step 6: Install the Sigmafine Excel Add-in
- Follow the process in the "Sigmafine Excel Add-In" manual for installing the Sigmafine Excel Add-in.
- To verify that the Sigmafine Excel Add-in was properly installed:
Open Excel.

Verify that the SF menu is visible in the ribbon (toolbar).
If the SF menu item is not displayed in the ribbon:
In Excel, select File > Options.
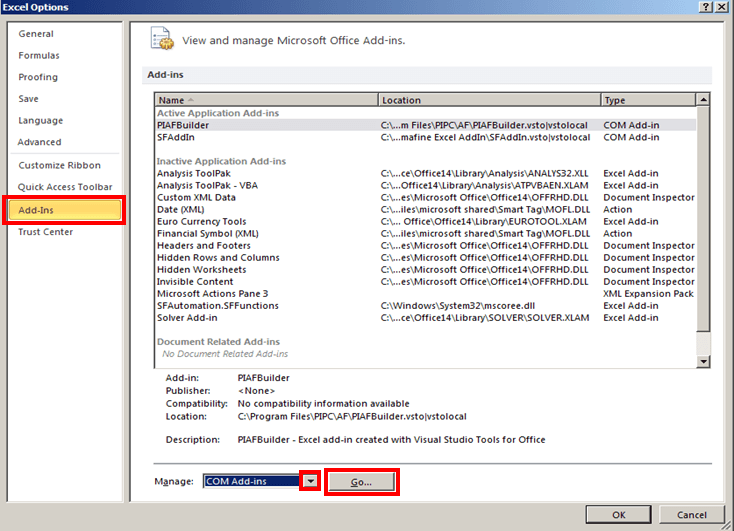
In the left pane, click Add-ins.
In the right pane, click on the Manage down-arrow and select COM Add-ins.
Click the Go ... button.
The COM Add-Ins window opens displaying the add-ins that are not currently added to Excel.

Select the SFAddIn (place a check mark next to it), and click OK.
Once the installation completes, open Excel again.
At this point, you'll want to set the Sigmafine Excel Add-In to start automatically with Excel.
Select File > Options, then click on Add-Ins.
Click on the Manage down-arrow and select Excel Add-ins (if not already selected).
Click the Click the Go ... button.
An Add-Ins window opens.
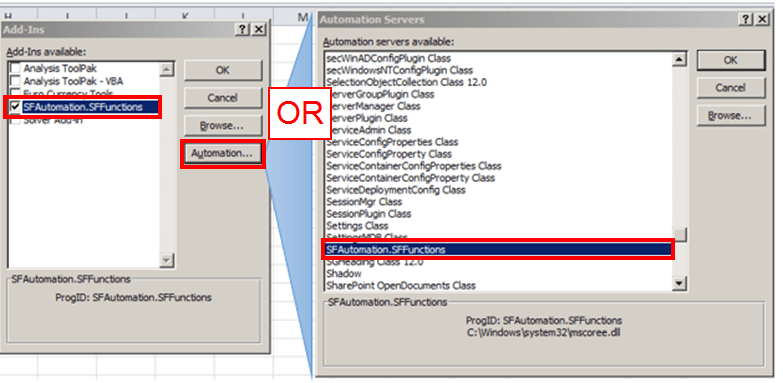
Select the SFAutomation.SFFunctions (place a check mark next to it).
Note:
If the SFAutomation.SFFunctions add-in is not listed under Add-Ins available:
Click on the Automation button to open the Automation Servers window.
In the Automation servers available list, search for and select SFAutomation.SFFunctions (as shown in Figure 4).
If 'SFAutomation.SFFunctions' is not present in the list, contact Pimsoft Technical Support for additional assistance.
Click OK to save your selection and close the Automation Servers window.
In the Add-Ins window, click OK to save your selection and close the window.
Note:
For Client ONLY installations and Server/Client installations - the Sigmafine Server & Client kit places the Sigmafine Analysis plug-in to the default PIPC directory. This plug-in allows you to see the “Sigmafine Analysis” tab in PI System Explorer. If you cannot see the tab in PI System Explorer after installation, perform the following steps:
Navigate to the Sigmafine installation directory.
Open the 'Bin' sub-directory.
Verify that the 'AFPlugInSigmafineAnalysis.dll' is copied to the directory for 32bit and 64bit instances of PIPC\AF.
Example Directory:
C:\Program Files\PIPC\AFCopy the AFPlugInSigmafineAnalysis.dll file you see in this directory.
If these steps do not cause the Analysis tab to show up in PI System Explorer, please verify the steps described in the Pre installation Configuration Steps section to be sure that you have setup the Sigmafine Analysis tab correctly.
(This is not for Server ONLY installations)